Anyone who plays any type of miniature games knows how important terrain can be. It can hinder or help your forces. One of the most common types are hills. They can provide elevation and block line of site, and can often control the flow of a battle.
 |
| Do you know how hard it is to find hill memes that AREN'T from the Sound of Music or The Hills have Eyes? |
Hills are also some of the least expensive and easiest terrain types to construct. A very common method is to use insulation foam boards - they have the strength to hold up to continued use but are extremely light and fairly easy to work with (especially if you use a hot foam cutter). Glue multiple layers together (and you can use simple PVA (i.e. common white glue) and them carve them into shape. I like to add sand for texture, then paint (don't use canned spray paint however (unless you do something else to seal them first) as the propellants will eat the foam. Then add some flocking / static grass and you are done.

I've made a few dozen of these myself over the years. Being so light they are easy to transport to conventions and events. Well as long as I have a vehicle big enough to hold them. The problem is the sheer volume that these take up. My goal (once I am able to start running events again) is to have enough for 20 tables of terrain - which is about 40 hills. Each of them is hand made so has a unique shape. I have two bins full of nothing but hills.

I remember seeing some stores that had these green plastic hills - they weren't very tall (about an inch), and were all simple ovals (though in a couple of sizes), but you could stack them. I have wanted to have 'stackable' hills for some time.
Well now that I have finally entered the 3D printing hobby (and it is a hobby in and of itself - it is not nearly to the point of being a plug and play tool), I thought I would be able to make some of my own stackable hills.
Unfortunately to 3D print something, you need a design - and that is a little trickier than taking a hot wire to a piece of foam. I thus did what is now the common starting place - I googled it. And found nothing. I looked on thingiverse and found zilch. I found round and oval plant dish that I thought I was going to have to use, but then my luck turned.
As I mentioned last time, I found a project for terrain for Armada. The islands are printable in 'vase' mode - which gives a hollow result as opposed to the more basic solid shape.
One of the required steps in turning a 3D design into an actual solid object is to slice it - which is to break the model down into layers - I use a free program called Cura - this not only slices models, but it allows you to do some other basic manipulation of the model including rotating and shrinking or enlarging it. You can do this vi drag-n-drop - or by setting the values. You are also able to scale the entire model, or just increase a specific axis.
So flipping the models upside down, scaling the larger of the x or y axis for the hill to 200mm (which is the largest my printer can handle (some I rotated slightly to fit better), then increasing ONLY the z axis to exactly 35mm (which was the size that most of my hills were already).
My first attempt did ok, but it was too flimsy. I tried playing with several parameters, but it didn't do much. Then I changed out the nozzle on my printer from the default 0.4mm to 1.0mm (the largest it will support). Larger nozzles result in thicker, stronger prints, but sacrifice detail to do so. However the details weren't my main concern - and the 1.0 mm nozzle gave me great reasults.
Of the seven design, I like 4 of them.


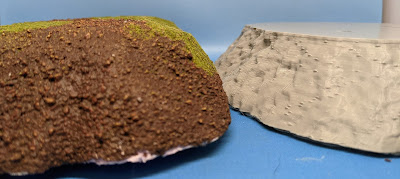
While I haven't finished them (I just finished printing the last (10 of each of the 4 varieties), I am also able to see a huge difference in the space these will take up just by comparing a couple of them.

Also I wanted to make sure that the hills would work with models - so I pulled out my demo Undead army to compare it them with.


The 'pimples' you can see on the sides are where the slicer is moving the seam on each layer - so it isn't one single, very prominent seam running down the full side of the model. They are not very noticeable when viewed from a normal table top distance, and even less so when sand is added.
One problem that comes from 3D terrain (no matter how it is made) is getting the static models/units to stand on it, when they really only can stand on flat surfaces. This is worse with hills.


They all work the same, by slipping under the end of the unit to support it at the same height as the hill.

Since all my new hills are going to be a consistent height, I figured I'd make my own support that fit them exactly.
My first idea was a large die


So with some more work, I'll be able to replace two bins full of Styrofoam hills with 3D printed versions that take up less than a quarter of the space
 |
| New hills - 4 stacks of 10 on the left - my old hills on the right. |
Now if I actually had an event to bring these to :-)
Because it is all fun and games . . .
This is genius! 3D printed hills that stack are exactly what my club needs without me having to store a bajillion boxes of the things 😊
ReplyDeleteThanks. More room for buildings and all the resin terrain pieces!
Delete