According to Mantic, there will be big (though maybe not giant as it were) robots with pilots inside fighting in the future. Nearly every faction has a strider. The Veer-myn don't because they are - well rats. However the tunnel runner may take that same spot in a list. I do find it surprising however that the Asterians, the faction half composed of robots and drones, do not actually have a big robot in their faction.
 |
| Polaris, Ajax and Heavy Burst Laser Enforcer Striders |
These can be a little fiddly to get together, so I thought I'd try to help out a bit. First is the Enforcer / GCPS / Rebs / Plague strider. This one bot has four configurations and can be taken in four factions (though the GCPS list is still in beta testing for Deadzone, and the rebs are not yet in Warpath). These are (for Warpath):
- Strider (Heavy Burst Laser, Assault Weaponry)
- Urban Assault Strider (Heavy Flamethrower, Chainsaw)
- Polaris Strider (Polaris Cannon, Assault Weaponry)
- 'Ajax' Siege strider (Grav-ram Spear) (only for enforcers)
Unfortunately the strider kit only comes with two options - the Urban Assault and Polaris. The 'Ajax' variant has metal conversion bits - and these were originally only available as part of the Warpath kickstarter.
(Note - when you write up a post and then push back the release for it, things can change).
Mantic just recently put up conversion kits on their web store for the Strider Heavy Burst Laser and Iron Ancestor Doomstorm varient. They are also looking into adding the Ajax bits (as well as the Arbiter Interceptor bits) as well.
The kit does have the pieces to make Enforcer, GCPS, Rebs and Plague Striders however (so long as you don't want the Heavy Burst Laser that comes on the default (and often cheapest) variant
I showed off all the strider bits
here and Ajax bits
here - so how do these go together.
First off they go on the 60mm bases - the big MDF ones. There are two feet, two legs, a piece of armor for the right knee (the left knee has it molded on) and a single piece for the hips. The piece of knee armor fits on perfectly and easily. Not so much for the rest.
The hips and ankles are all ball joints - making this 'poseable', but also a very big pain to assemble. Now maybe if I had a few more hands to hold everything and allow myself to position the way I wanted . . . but I only have the two.
My recommendation is (assuming you are right handed, like I am. If you are a southpaw then reverse the hands for this) to take the two legs and fit them onto the hips, then with your left hand pinch them together - effectively holding these three pieces in place, but not glued (yet).
Then put the feet either on the base or your tabletop, and maneuver them into place where the ankle ball fits into the opening in the legs. Now it gets even fiddlier, as you gently move either leg into position so that they both meet up with the feet. You actually have a bit of leeway here - the real tricky point is to keep the top of the hips flat and level once the ankles are in the feet.
 |
| leg pieces |
This is another case of needing more hands - one to hold these five bits pressed together, another to hold the camera, another to take the picture . . . luckily for Christmas I got a smart phone camera tripod to help with this situation, but not enough.
First glue the knee cover on, that is trivial. Then I place the feet on the base (or your table, your aren't gluing them yet). Then take the hips and the two legs, and pinch them together with one hand (I'm right handed, so I used my left for this). Now adjust the hips so the top is flat and level while still pinching it between the legs. Then place the legs in the feet. You actually have quite a bit of flexibility here as to the position of the legs and fee - the key is you need to keep the hips level. Once you have all five pieces lined up in the position you want, then you glue them together, hips first.
Ok, so here is the completed legs.
 |
| legs, resting comfortably |
 |
| standing - with the hips level. |
There is another way to assemble these that can work as well (or maybe even a little better). Again start by pinching the legs to the hip, then position the feet where you want them with the legs fitting into them. Now instead of starting with the hips, glue the feet to the base in the correct position. By doing this you now have a firm location for the legs, so when you glue them together you can be sure where they go. I would still glue the legs to the hips first as this is where all the adjustments will need to be made (plus if you glue the legs to the feet first, then you may not be able to fit the hips between the legs (since you have to open them up to fit the ball joint in), while gluing the legs to the feet is dropping them straight down.
 |
| attached to base |
Next you glue the body to the hips. This is a circular joint, so you can position the body at different angles (though be careful here, as you can turn the body so much that the canopy may not fit, or the weapons will not fit because a leg is in the way. As always, dry fit first).
 |
| strider body |
 |
| body attached to legs |
At this point you have to make your first decision as to what type of strider you are making. There are three canopy variants, one for Enforcers, one for GCPS/Rebs, and one for Plague.
The enforcer canopy is completely closed
 |
| enforcer canopy |
 |
| enforcer strider |
GCPS and Rebs have a two piece open canopy. This allows you to see the pilot inside the strider
 |
| GCPS / Rebs canopy |
 |
| GCPS/Rebs strider |
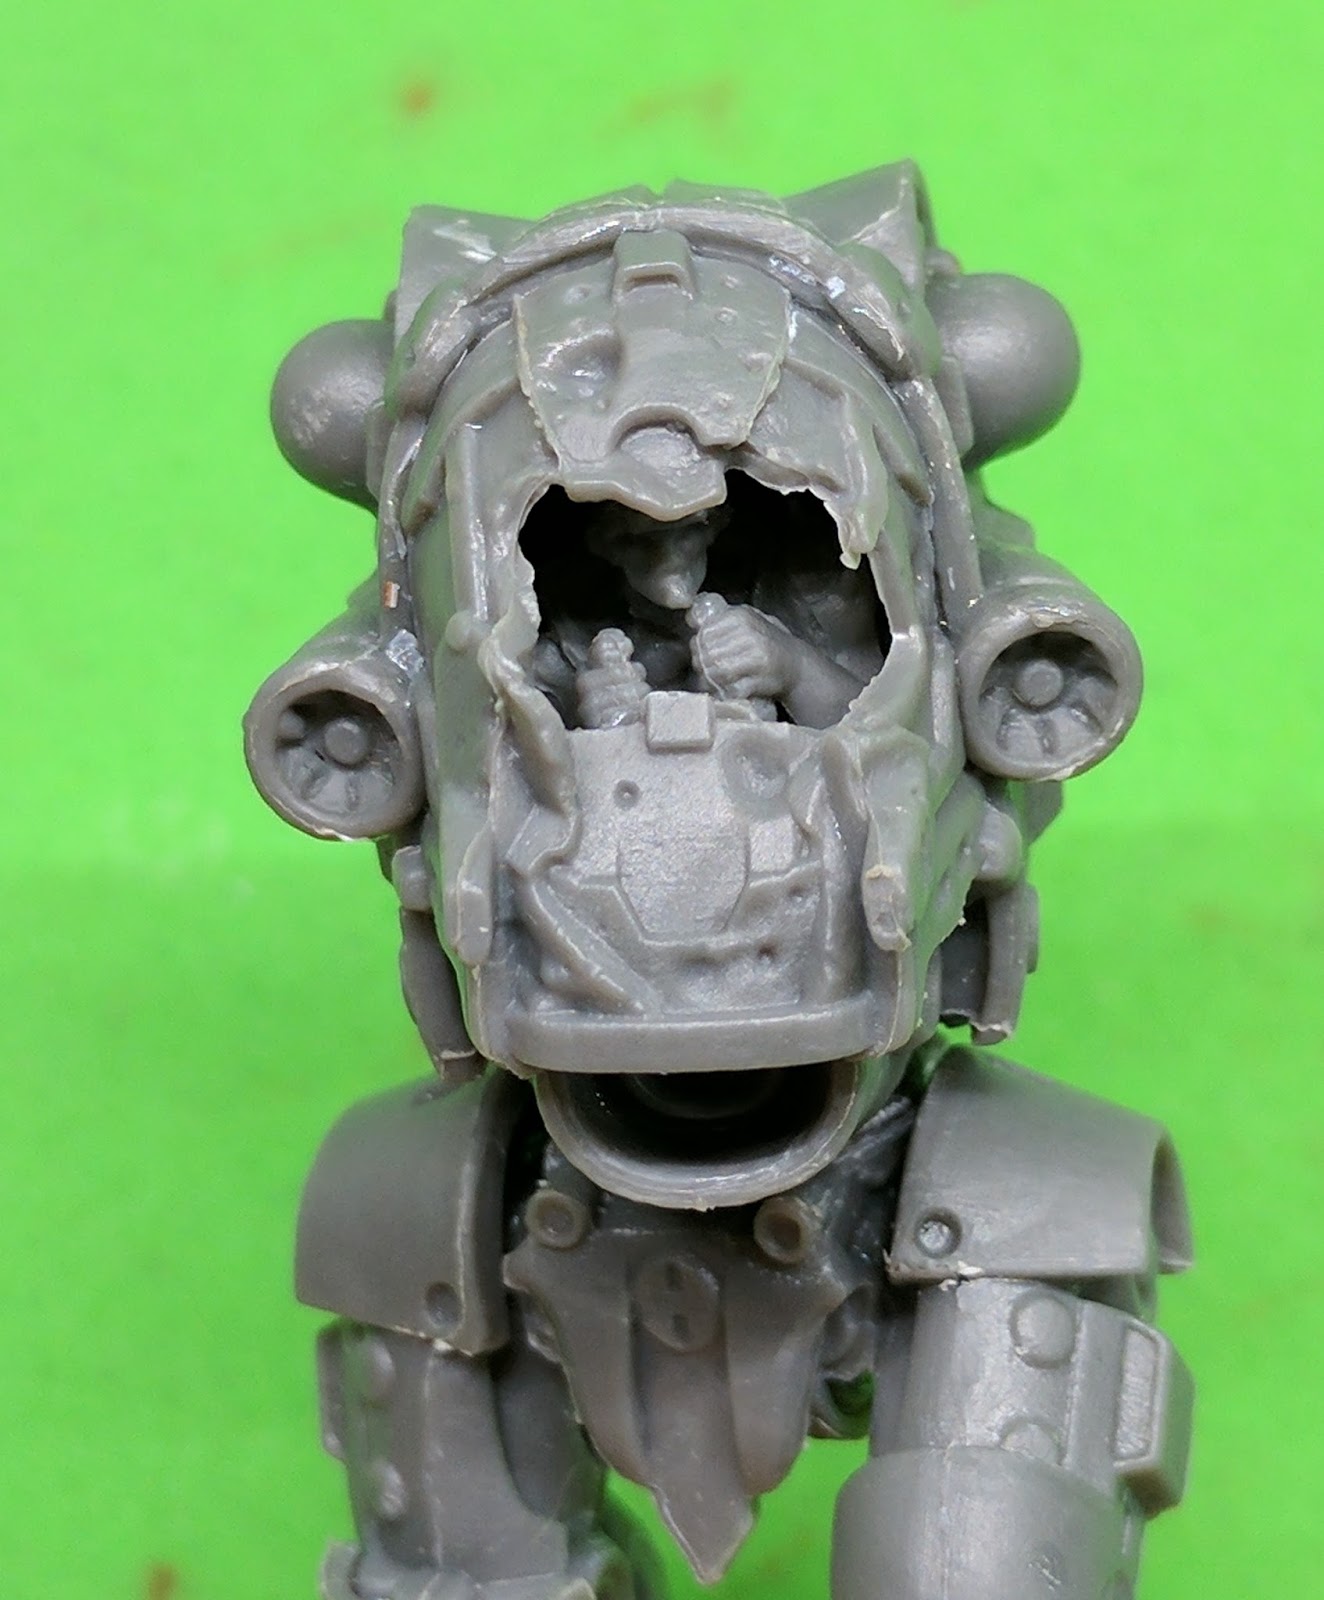
The plague loot their vehicles, and are not gentle about it. They smash in the canopy to kill or infect the pilot. This is also open, so you can see the plague pilot within.
 |
| plague canopy |
 |
| plague strider |
The choice of canopy determines the pilot to put inside. The easiest of these are the Enforcers, as you can't see the pilot, so there is no actual model for them. The GCPS and Rebs variant share the same body but have different heads, and the Plague variation stands alone. (Would you want to share anything with the plague after all? It would come back all sticky and smelly).
While technically referred to a sprueless plastic, the heads and arms do, in fact, come on sprues. These are in a little bag inside the main bag for the strider.
 |
| pilot sprues |
 |
| variation in building |
The GCPS and Rebs share the same body and arms, they just have different heads (because of course the disciplined and structured corporate troops would never allow someone with a beard to pilot a Strider. You start letting up on standards and the next thing you have is anarchy. Anarchy I tell you!
 |
| GCPS pilot |
Of course the rebs refuse to bow down to Big Razor, or any corporation. They may take our lives, but they'll never take our Beards. I mean Freedom!
 |
| Rebs pilot |
I would HIGHLY recommend that you paint your pilot before gluing him in place, as it will be extremely difficult to do much with them after assembly.
Also, the hot water trick also comes in handy here - the canopy may need to be heated up in hot water so that it can fit between the two blowers (beneath the shoulder ball joints). There is a small indentation in the canopy that fits these. The pilot may also require some fitting to get it just right.
 |
| GCPS canopy and pilot |
Then you get the plague pilot. He has his own body and arms, only wearing a dirty wife beater t-shirt instead of a real uniform. The detailing on the face seems a little soft, but then when your very flesh is rotting away and spikes are growing from every part of your body (ewwwww!) you aren't going to be in any beauty contests.
 |
| Plague Pilot |
There simply isn't a lot of room in the cockpit, especially for a big guy with spikes growing from his arms and shoulders.
 |
| Plague pilot and canopy |
After the canopy and pilot (if you are using an open canopy) comes the choice of weaponry. The kit, as mentioned, comes with two of the four options - the Polaris Cannon or the Heavy Flamethrower and Chainsaw combination.
 |
| bits for the Heavy Flame Thrower and Chainsaw |
 |
| bits for the Polaris Cannon |
The Ajax bits are, so far, only available with the kickstarter. This even includes a more heavily armored canopy, and can only be taken by Enforcers.
 |
| bits for the Ajax Siege option |
I don't have the bits for the Heavy Burst Laser myself yet, but here is the Mantic picture
Ok, back to assembly. There are two elbow covers - one goes on an arm, the other goes on the chainsaw. They each only fit in one place one way, so are easy to do.
 |
| Elbow bits |
I had already assembled an Enforcer Strider with Polaris cannon, so the next one is a Plague Strider with the flame thrower and chainsaw.
The shoulder joints, like the hip joints, are ball and socket. Doing the two separate arms are easier, as you do not have to position them to hold a specific weapon (you do this the same way you assembled the hips and legs).
Since the two arms are independent, you can glue the upper arm on alone.
 |
| upper arm |
From what I can tell, the upper arms are interchangeable - either can go on either side. One has an extra bit of armor - looking at them afterward it (now, way too late) occurs to me to swap these out from two kits - so one has both upper arms armored, the other has neither.
Anyway, after the arm is set, then you simply glue the flame thrower to it, positioning it as you like.
 |
| add flame thrower |
You do the same with the left arm and chainsaw.
 |
| chainsaw on the left |
What is it with so many horror and sci-fi fighters using chainsaws? (Ok, GW calls them chain swords, still the same). Have any of the people who think these up, sculpt or paint them actually used a chainsaw? Now I'm not a lumberjack, so maybe I was doing something wrong - but every time I've used a chainsaw I spent more time re-starting the blamed thing than ANYTHING else. Now add on waving it around and you have a huge chunk of metal and points that you will be very lucky to hit an enemy with and not cutting off your own limb!
 |
plague shoulder pads spikes |
Another thing - what is with the fashion obsession. Why does ANYONE care about shoulder pads? Of course there are different ones - the spikes are for plague, the flat with the round holes are enforcer, and rebs have a couple of banners hung on them.
I also put together a GCPS variant with the same weaponry.
 |
| GCPS w/ Flamethrower & Chainsaw |
 |
| Added shoulder pads |
 |
| Banner and some rockets |
 |
| From the back |
 |
| Enforcer shoulder pads |
The Ajax variant is as easy to assemble as the flamethrower / chainsaw, as the two arms are not connected.
First you glue the arm to the inside of the shield.
 |
| arm and shield |
To mix things up, I did the upper arms and shoulder pads before doing the the metal cockpit on the AJAX Seige Strider
 |
| body w/ upper arms & shoulder pads |
Strider with remaining bits.
 |
| Seige pieces |
 |
| The small round piece is a cap on the elbow holding the spear. |
 |
| add the seige cockpit |
 |
| add the shield on the left arm |
 |
| add the Grav-Ram Spear to the right arm |
 |
| Four different striders |
The Forge Fathers have their own strider - the Iron Ancestor. It has four variations, but the standard kit only comes with the one.
 |
| Iron Ancestor bits |
 |
| other side |
This is actually easier to assemble than the strider, as the legs and feet are together, and the hips are NOT ball/socket joints. The legs have a round 'disk' on the top, the fits in the slot in the waist, and they are marked L and R to keep the straight.
 |
| Legs into the slots |
 |
| standing up |
You can glue the iron ancestor to a base at any time - there is no advantage (like there can be with the feet on the strider) to when you do it.
 |
| glued to base |
The body and waist are basically ball and socket joints again - so you can position the body any way you might like.
 |
| body on waist |
The hammer head needs to be glued to the right arm, then the arm to the body (another ball/socket)
 |
| Right arm and hammer |
 |
| right arm on body |
 |
| from back |
The left arm is a single piece, so can be glued on with the angle you like
 |
| left arm |
 |
| side |
Lastly, there is a jump pack that goes right below the head on the back of the model
 |
| jump pack |
 |
| Complete from front |
The last type of walker is the Marauder Stunt bot. Unfortunately I can't show you how to assemble it because the one I have I put together a couple of years ago. But I can show pictures of it.
 |
| The hatch can be open or closed |
 |
| The arms are again ball/socket joints |
 |
| From the back |
 |
| and the side |
Ok, one final picture - I just wanted to compare the three walkers size wise - and the Iron Ancestor is much smaller than the other two (but it is a dwarf after all).
 |
| Strider, Iron Ancestor, Stunt Bot |
Because it is all fun and games . . .


 Ok, back to assembly. There are two elbow covers - one goes on an arm, the other goes on the chainsaw. They each only fit in one place one way, so are easy to do.


I know it's an old post but thank you, this was extremely helpful when building my Strider.
ReplyDelete