As all you fashionistas know, the key to a marvelous outfit is proper accessories. These simply make or break the look darlings. Of course no one knows more about this than our favorite diva, Blaine himself.

Ok, time to turn off the fashion channel and talk Star Saga! Wave 2 of the kickstarter is shipping now, and there is so much here it will take quite a few posts to show it all off.
There were several accessories for Star Saga available in the kickstarter.
First was the gaming mat. I guess I hadn't read the full description, but it is much higher quality than I expected. I've found lately that game mats are very valuable to keep tiles or cards from slipping. I had actually been using old Mars Attacks mats flipped over for this, so it made sense to pick one up.
Wow, was I impressed. The print quality is simply gorgeous. This is the first neoprene mat I've gotten that is stitched around the edges - I don't know if it makes any difference gaming or storing the mat, but it sure looks better. Definitely gives it a "finished" quality.

Flipping it over, there is a mantic logo on each of the corners. Also, it has very few creases in it (as opposed to the Vanguard mat I got, which even after both sitting out and being rolled STILL as creases in it from shipping.


A comparison of the corners just shows the quality.

It looks so good, in fact, that I plan to use it as a backdrop for pictures when I am not using my lightbox.
Another accessory was an additional set of dice - which are the exact same dice you get in the set, just more.
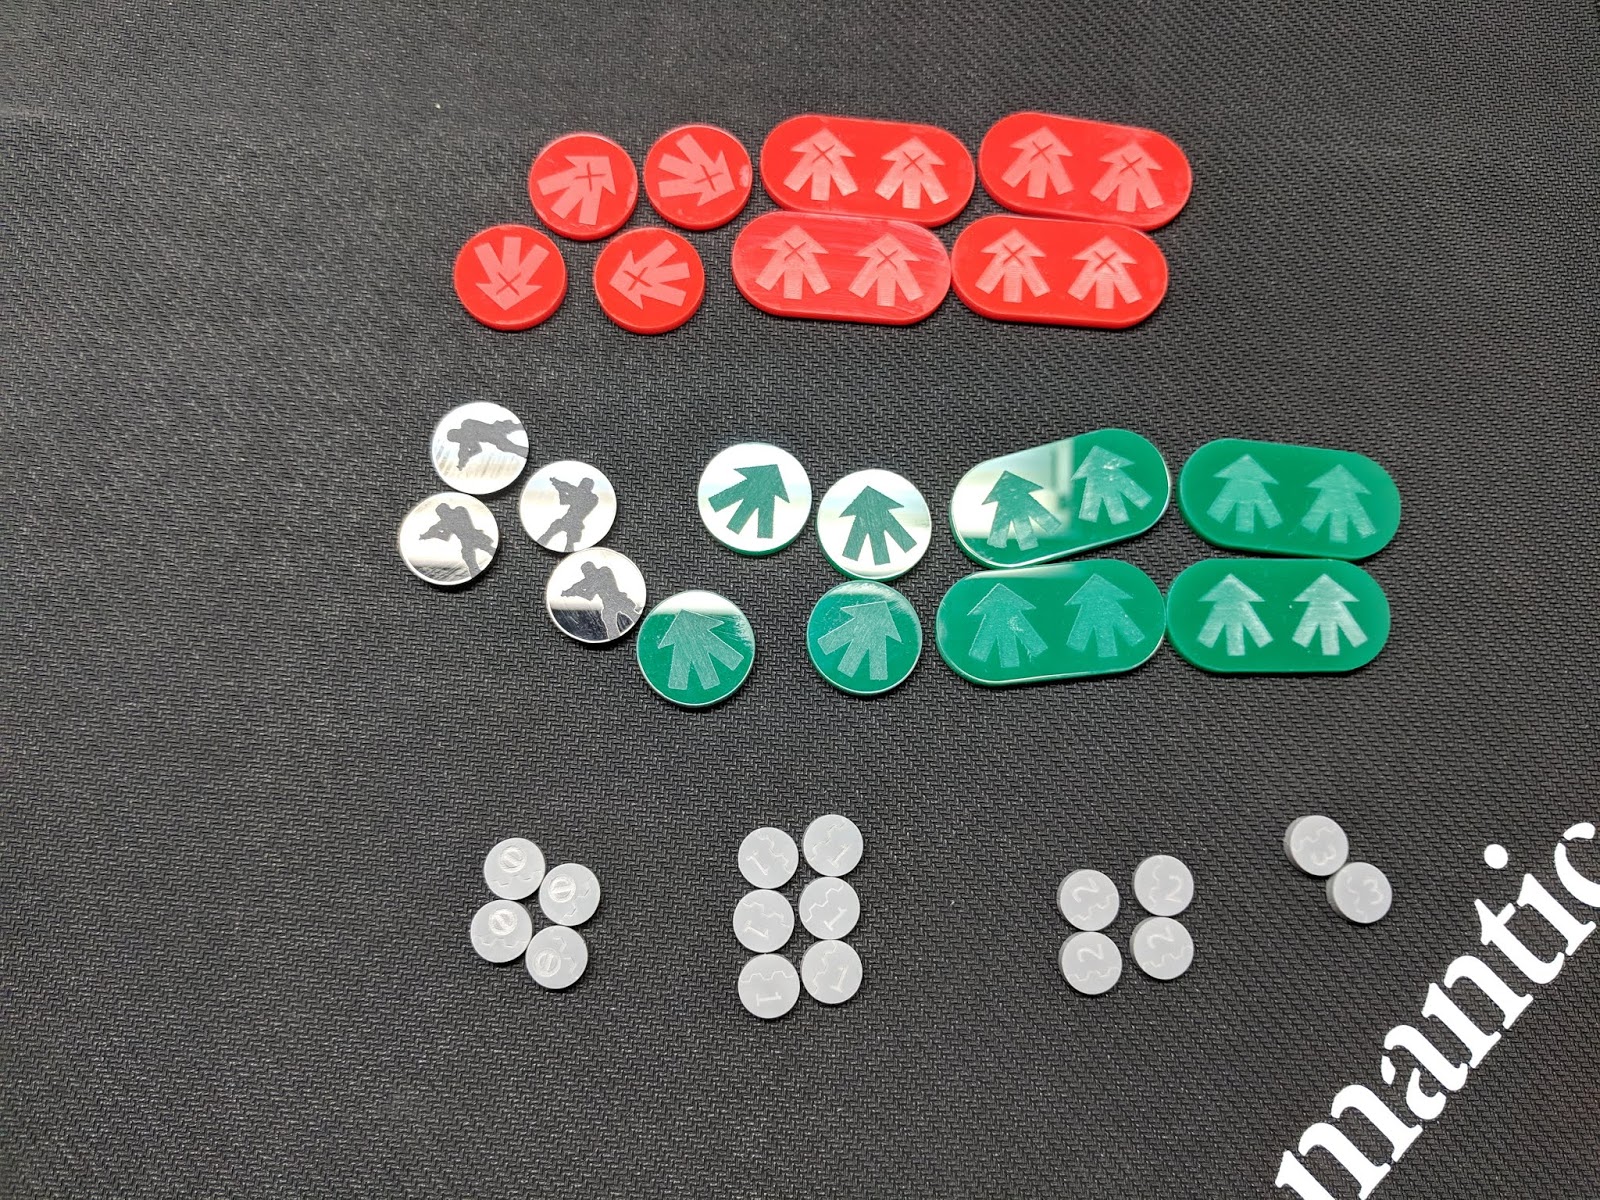
There are also acrylic counters

The acrylic range rulers (and flame template) are great improvement over the card ones - though it would have been nice for a little bit of engraving on them so they weren't just plain. There are also tokens to mark the players, wounds and experience. The etching on these is ok, but not great.

For the nexus player, there are spawn points, darkness markers, and lock counters. The etching on the lock counters is a bit too light - you can barely see it - and it will be quickly lost in a game. However you should be able to ink over these to make them stand out more.
When putting these in my box, I did find that the new spawn point markers would not fit in the little box I had for counters (though the cardboard ones did). The cardboard markers are two sided - flip them from open to closed. The acrylic ones are instead two pieces - red for closed and green for open. They are also at least twice as thick as the cardboard ones.
Then comes the nexus screen. This came in a nice retail package.


Inside was the colorful four part screen, with the box cover art extended to either side. In addition there were eight reference sheets included - four cardstock and four more on just paper.
When I first looked at the cardstock ones, I noticed that they "appeared" to be misprinted - the front and back were not the same language (there were in English, French, Spanish and Italian). The second set (the thinner ones) were, I first thought, printed correctly.


Then I flipped over the screen - to reveal there were two clear pockets for these reference sheets. At this point I realized that if they had been printed the way I expected - then you wouldn't be able to put both pages out and usable by the nexus player. What I first thought was an error was instead a great design feature! I think the second set were purely to appease those who thought they were misprinted. In fact if you only had the second set then they would be in fact misprinted.

The reference sheets fit very well. Even better - when the screen is folded together, it fits in the main box perfectly!
The last accessory was the dice tower. I've never felt the need for one of these personally, but it can be a great tool, especially if you want to be sure you are never fudging any of the dice rolls (even though as a game master there are times you do need to fudge them (in both ways at different times).

It came in a bag, and unfortunately (like so many of their models) there were no instructions. It is all MDF except for an acrylic face plate.

After some testing and fitting, I did finally figure it out. And of course I initially tried to assemble it wrong (so you won't have to)

The back plate is the large piece with lots of holes in it. There are three large baffles and five small ones. The top two have a bit of an indentation taken out - this gives the dice room to fall easily into the tower. These indentations should point toward the center of the tower. The baffles have different size tabs - the smaller ones are for the acrylic face plate, while the larger are the black plate.

The straight baffle goes in the large tab in the center.

Using white glue, I put in the large baffles - and then the small ones that fit in the smallest of the holes.

I then tried to put the white faceplate on - and after quite a few minutes I realized this is where I did it wrong. You want to glue the baffles to the faceplate FIRST, then attach the back plate. Why? Because the back is wood, while the front is acrylic - so the back is slightly flexible (while the front is not). (Luckily the glue had not yet completely set, so I was able to take the pieces back off with little trouble.
Being flexible, it is easier to guide the eight pieces into the connectors than into the more rigid ones on the face. I chuckled as I got this to work, thinking of how much I hate when I have to glue four parts (typically body, 2 arms and a double handed weapon) together at the same time - and this one is 8 pieces together!


After the front and back are attached to the baffles, you glue the sides to the tower. The front and back have different size notches making it a bit easier. You need to do these one at a time, as you need to install the last baffle between the sides.


When attaching the sides, you want to do one side first, then fit the final baffle in place. The two tabs fit into the back, and the tabs on the side fit snugly on the sides


Then wrap rubber bands around the tower and allow it to dry.
 The last five pieces make up the tray. This is a very simple box, and again once assembled you want to wrap it with rubber bands while the glue dries.


Once the glue sets you are done!

The tower fits perfectly into the tray, almost like it was designed to do that :-)

And of course it works very well to randomize your dice.

You can also use it to store your dice. Place the dice tower on it's back with dice in it, then slip the tray over the top, covering the top with larger back side, and the front with the bottom. This will seal all the dice inside. If you try to put the tower into the tray, then gravity will play it's cruel tricks on you, and you will have dice falling out everywhere!

So there are the Star Saga accessories.
Next up we'll start digging into the expansions to the game!
Because it is all fun and games . . .

Ok, time to turn off the fashion channel and talk Star Saga! Wave 2 of the kickstarter is shipping now, and there is so much here it will take quite a few posts to show it all off.
There were several accessories for Star Saga available in the kickstarter.
First was the gaming mat. I guess I hadn't read the full description, but it is much higher quality than I expected. I've found lately that game mats are very valuable to keep tiles or cards from slipping. I had actually been using old Mars Attacks mats flipped over for this, so it made sense to pick one up.
Wow, was I impressed. The print quality is simply gorgeous. This is the first neoprene mat I've gotten that is stitched around the edges - I don't know if it makes any difference gaming or storing the mat, but it sure looks better. Definitely gives it a "finished" quality.

Flipping it over, there is a mantic logo on each of the corners. Also, it has very few creases in it (as opposed to the Vanguard mat I got, which even after both sitting out and being rolled STILL as creases in it from shipping.


A comparison of the corners just shows the quality.

It looks so good, in fact, that I plan to use it as a backdrop for pictures when I am not using my lightbox.
Another accessory was an additional set of dice - which are the exact same dice you get in the set, just more.
There are also acrylic counters

For the nexus player, there are spawn points, darkness markers, and lock counters. The etching on the lock counters is a bit too light - you can barely see it - and it will be quickly lost in a game. However you should be able to ink over these to make them stand out more.
When putting these in my box, I did find that the new spawn point markers would not fit in the little box I had for counters (though the cardboard ones did). The cardboard markers are two sided - flip them from open to closed. The acrylic ones are instead two pieces - red for closed and green for open. They are also at least twice as thick as the cardboard ones.
Then comes the nexus screen. This came in a nice retail package.


Inside was the colorful four part screen, with the box cover art extended to either side. In addition there were eight reference sheets included - four cardstock and four more on just paper.
When I first looked at the cardstock ones, I noticed that they "appeared" to be misprinted - the front and back were not the same language (there were in English, French, Spanish and Italian). The second set (the thinner ones) were, I first thought, printed correctly.


Then I flipped over the screen - to reveal there were two clear pockets for these reference sheets. At this point I realized that if they had been printed the way I expected - then you wouldn't be able to put both pages out and usable by the nexus player. What I first thought was an error was instead a great design feature! I think the second set were purely to appease those who thought they were misprinted. In fact if you only had the second set then they would be in fact misprinted.

The reference sheets fit very well. Even better - when the screen is folded together, it fits in the main box perfectly!
 |
| It is great when a plan comes together. |

It came in a bag, and unfortunately (like so many of their models) there were no instructions. It is all MDF except for an acrylic face plate.

After some testing and fitting, I did finally figure it out. And of course I initially tried to assemble it wrong (so you won't have to)

The back plate is the large piece with lots of holes in it. There are three large baffles and five small ones. The top two have a bit of an indentation taken out - this gives the dice room to fall easily into the tower. These indentations should point toward the center of the tower. The baffles have different size tabs - the smaller ones are for the acrylic face plate, while the larger are the black plate.

The straight baffle goes in the large tab in the center.

Using white glue, I put in the large baffles - and then the small ones that fit in the smallest of the holes.

I then tried to put the white faceplate on - and after quite a few minutes I realized this is where I did it wrong. You want to glue the baffles to the faceplate FIRST, then attach the back plate. Why? Because the back is wood, while the front is acrylic - so the back is slightly flexible (while the front is not). (Luckily the glue had not yet completely set, so I was able to take the pieces back off with little trouble.
Being flexible, it is easier to guide the eight pieces into the connectors than into the more rigid ones on the face. I chuckled as I got this to work, thinking of how much I hate when I have to glue four parts (typically body, 2 arms and a double handed weapon) together at the same time - and this one is 8 pieces together!


After the front and back are attached to the baffles, you glue the sides to the tower. The front and back have different size notches making it a bit easier. You need to do these one at a time, as you need to install the last baffle between the sides.


When attaching the sides, you want to do one side first, then fit the final baffle in place. The two tabs fit into the back, and the tabs on the side fit snugly on the sides


Then wrap rubber bands around the tower and allow it to dry.


Once the glue sets you are done!

The tower fits perfectly into the tray, almost like it was designed to do that :-)

And of course it works very well to randomize your dice.

You can also use it to store your dice. Place the dice tower on it's back with dice in it, then slip the tray over the top, covering the top with larger back side, and the front with the bottom. This will seal all the dice inside. If you try to put the tower into the tray, then gravity will play it's cruel tricks on you, and you will have dice falling out everywhere!

So there are the Star Saga accessories.
Next up we'll start digging into the expansions to the game!
Because it is all fun and games . . .
Comments
Post a Comment