While the mule may be reliable ground transportation, there is nothing like a bit of air support to bring the troops directly where they need to be. Thus is the GCPS TAD-65 Hornet Dropship, the final vehicle kit for Warpath funded by last years Kickstarter.


 Like all the kickstarter kits, this comes in a big bag of parts with no instructions. In addition, as part of the kickstarter I also received the Plague upgrade parts as well, so we'll make both.
Like the other vehicles, you often want to put these together in sub-assemblies. We'll start with the smallest - the guns. There are three options for weaponry on the Hornet - the default is the rotary cannon, but you can also take a laser cannon or missile launcher. The laser cannon and missile launcher are one piece each, but the rotary cannon comes in five pieces

Simply glue the barrel mount into the base, and the three barrels into the mount.

There are also some heavy laser rifles. These are meant to be mounted on gimbles inside the passenger compartment for additional fire support. The kit comes with the rifle barrels and the stocks, as well as stocks with hands firing them and arms that attach to these.
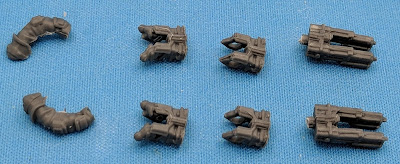
Glue either stock to each pair of barrels. The arms go on a standard marine body (not included) and then attach to the hands on the stocks.

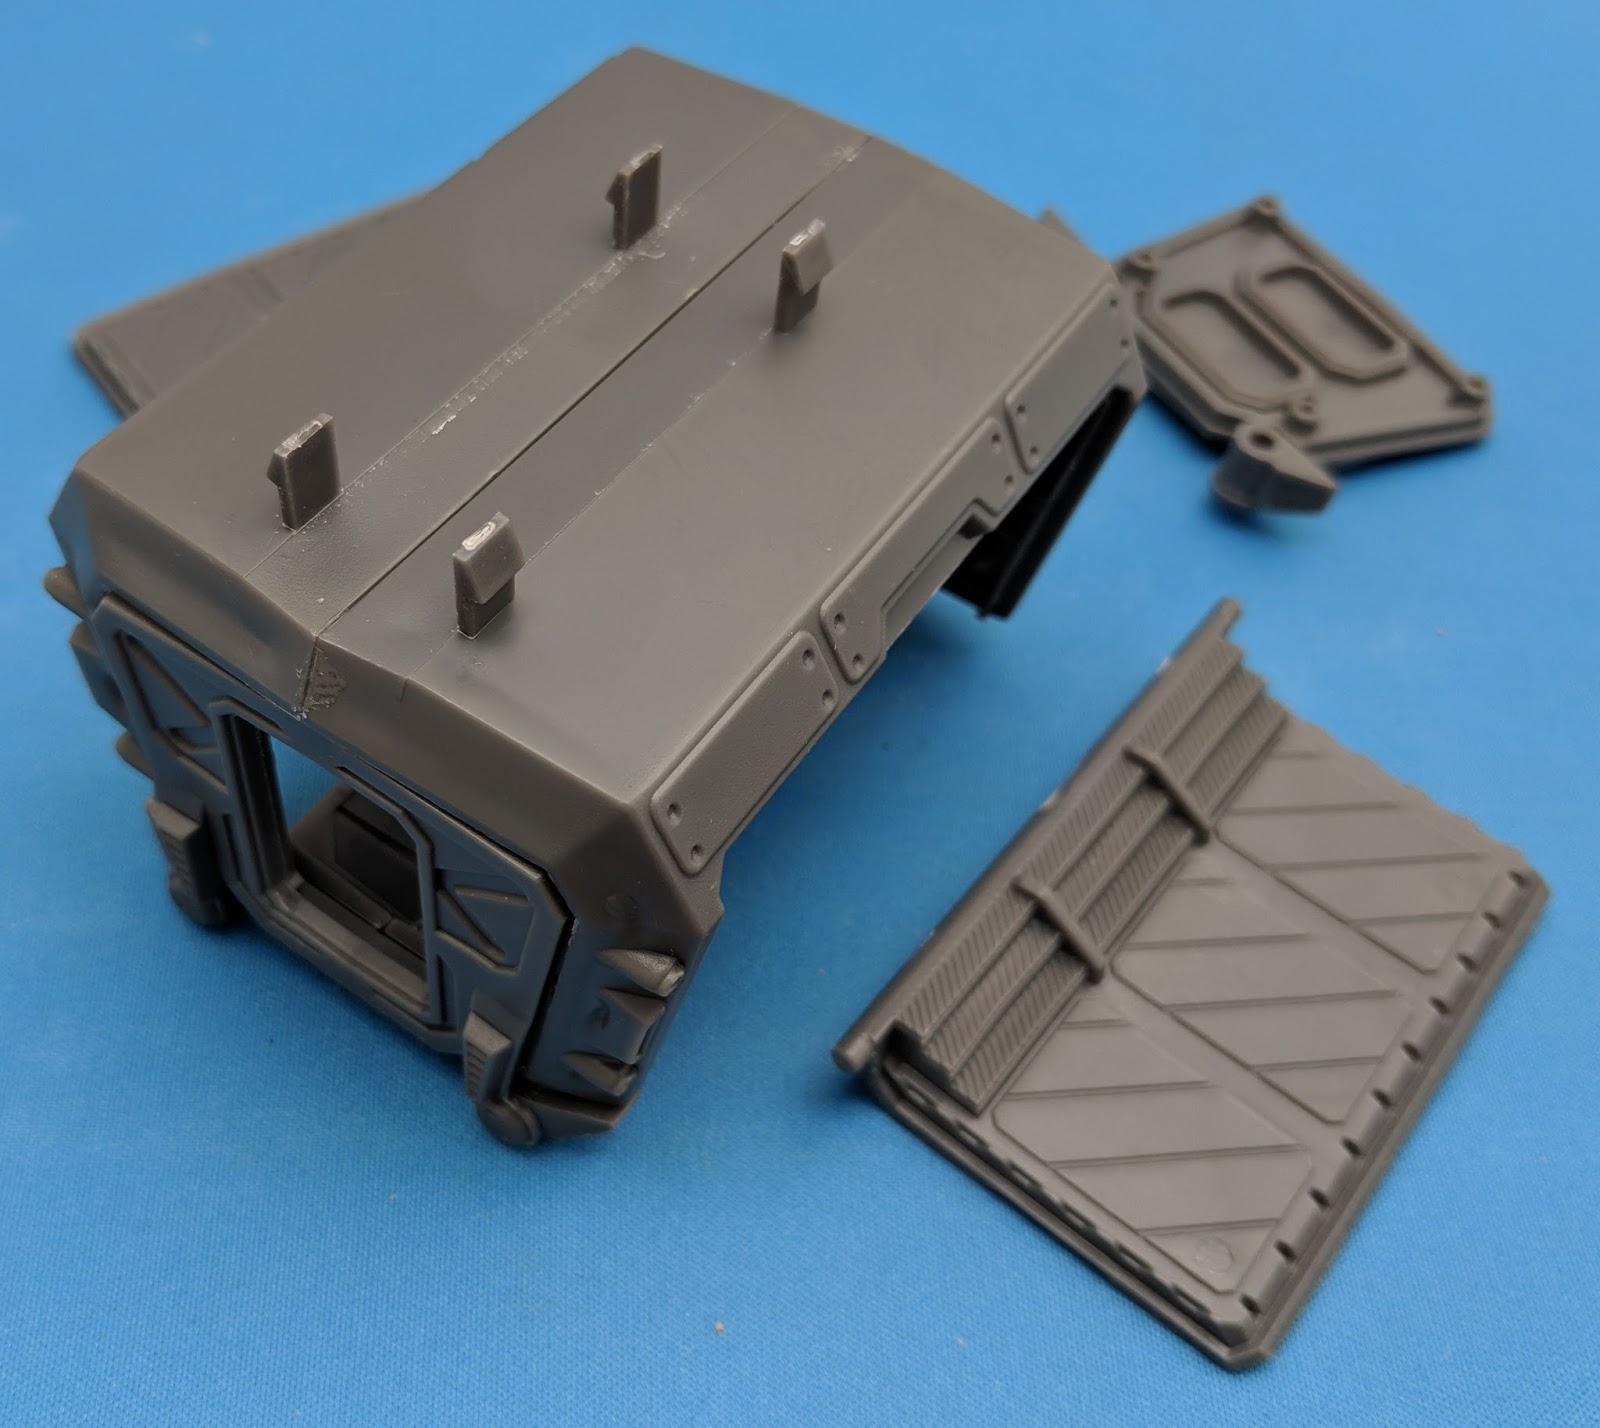
The drop ship is a transport, so needs a passenger compartment. This comes in six pieces.


First glue the two halves together. The top has the hooks to attach this to the undercarriage of the dropship, with the ones closer to the end indicating the front of the compartment.


Next glue the front of the passenger compartment to the end. The front end has the open hatch.

There are small holes in the bottom of the hatch piece for the sides of the compartment. The pins on the sides go in these holes, allowing these to be opened or closed as needed.

Glue the back of the compartment on, and it holds the sides in place but allows them to open when desired.


Inside the passenger compartment are four pins used to attach the gimbles for the weapons. These are small corner braces you can glue in place, then glue the rifles to them if desired. Since there are four pins but only two gimbles/rifles you can put them how you want them - both on a single side, both to the front (or back), or mixed.


Next we assemble the fuselage of the plane.


The two halves of the main body fit together, leaving a hold and large groove to fit the cockpit into.

Slip the propeller in into the slot in the tail but do not glue it - it should be able to move slightly. Then glue the other side of the tail in place, locking in the rotor.

The tail and fuselage then go together.


There is a plate that fits on the bottom - this forms the holes to allow the passenger compartment to attach to the hornet. It is meant to be detachable - however this is currently no configuration of the hornet that does not include it (so I see no reason not to glue it in place).


Once the body is complete, then we assemble the wings.


Again, slip the rotors into the holes in the wings and do not glue them.

Then glue the round connectors over the rotors to the wings, locking them in place. Turn the wings over, and glue the vent covers in place.

There are two slots in the body, and two tabs on each wing.


Firmly slide the tabs into the slots and glue the wings in place.

There are two options for the landing gear - extended or closed. If you do the extended landing gear then you can have the dropship on the ground, otherwise you should always use the flying stand.
The extended landing gear comes in two pieces. There is a half circle connector from the strut that only fits in one way.


The pins on the strut (or on the cover) fit into the sides of the fuselage.

The covers fit very snugly, so you almost don't have to glue them. The struts don't fit quite as tight however, so if you want the ship to be landing you really need to glue these in.


There are seven pieces of the GCPS variant that are different than the plague version. The front cockpit cover, the wing tips and the tail stabilizers.


The cockpit cover slides into the fuselage - there is a long pin here that slides into the hole.


The wing tips fit on the ends of the wings


The tail stabilizers have the slots keyed so they only fit one way.

Though they aren't keyed for the body.

Snap the passenger compartment into place. The pins on the weapons fit under the front - however this is actually a fairly loose joint - so if you don't want to glue something in place (to give yourself options) you will definitely need to put in magnets.


A comparison shot with a mule

And with an enforcer dropship

I decided to put the landing gear down on my plague variant to make it even more different than the standard GCPS one.

The Plague have the same seven parts, plus two more.


All of these pieces (cockpit, wing tips and tail stabilizers) install the exact same way as the corresponding pieces on the GCPS version.


There are two claws on the front One of them is keyed to fit over the marking near the landing gear - it is too bad they both don't do this.

There is also a different plague weapon - though it has the exact same options as the GCPS version (but the plague gun looks a bit more wicked, so I glued it on).

The wing tips and tail stabilizers work the same way


If you want to mount weapons on the gimbles in the crew compartment, there are plague weapons and arms to use as well. Again, you have to BYOB (bring your own body) for these.


In addition there are a couple of corpses to add to it as well. One has separate arms that go over its head.


The one with his hands over his head fits below the cockpit.

The other has no obvious place, so I put him on the top

And it is done


Comparing it to the plague mule.

Finally, a comparison with the GCPS and Plague variants.

So what are your favorite Warpath / Firefight vehicles?
Because it is all fun and games . . .


 |
| hornet parts |
 |
| plague 'upgrades' |

Simply glue the barrel mount into the base, and the three barrels into the mount.

There are also some heavy laser rifles. These are meant to be mounted on gimbles inside the passenger compartment for additional fire support. The kit comes with the rifle barrels and the stocks, as well as stocks with hands firing them and arms that attach to these.

Glue either stock to each pair of barrels. The arms go on a standard marine body (not included) and then attach to the hands on the stocks.

The drop ship is a transport, so needs a passenger compartment. This comes in six pieces.


First glue the two halves together. The top has the hooks to attach this to the undercarriage of the dropship, with the ones closer to the end indicating the front of the compartment.


Next glue the front of the passenger compartment to the end. The front end has the open hatch.
There are small holes in the bottom of the hatch piece for the sides of the compartment. The pins on the sides go in these holes, allowing these to be opened or closed as needed.

Glue the back of the compartment on, and it holds the sides in place but allows them to open when desired.


Inside the passenger compartment are four pins used to attach the gimbles for the weapons. These are small corner braces you can glue in place, then glue the rifles to them if desired. Since there are four pins but only two gimbles/rifles you can put them how you want them - both on a single side, both to the front (or back), or mixed.


Next we assemble the fuselage of the plane.


The two halves of the main body fit together, leaving a hold and large groove to fit the cockpit into.

Slip the propeller in into the slot in the tail but do not glue it - it should be able to move slightly. Then glue the other side of the tail in place, locking in the rotor.

The tail and fuselage then go together.


There is a plate that fits on the bottom - this forms the holes to allow the passenger compartment to attach to the hornet. It is meant to be detachable - however this is currently no configuration of the hornet that does not include it (so I see no reason not to glue it in place).


Once the body is complete, then we assemble the wings.


Again, slip the rotors into the holes in the wings and do not glue them.

Then glue the round connectors over the rotors to the wings, locking them in place. Turn the wings over, and glue the vent covers in place.

There are two slots in the body, and two tabs on each wing.


Firmly slide the tabs into the slots and glue the wings in place.

There are two options for the landing gear - extended or closed. If you do the extended landing gear then you can have the dropship on the ground, otherwise you should always use the flying stand.
The extended landing gear comes in two pieces. There is a half circle connector from the strut that only fits in one way.


The pins on the strut (or on the cover) fit into the sides of the fuselage.

The covers fit very snugly, so you almost don't have to glue them. The struts don't fit quite as tight however, so if you want the ship to be landing you really need to glue these in.


There are seven pieces of the GCPS variant that are different than the plague version. The front cockpit cover, the wing tips and the tail stabilizers.


The tail stabilizers have the slots keyed so they only fit one way.

Though they aren't keyed for the body.

Snap the passenger compartment into place. The pins on the weapons fit under the front - however this is actually a fairly loose joint - so if you don't want to glue something in place (to give yourself options) you will definitely need to put in magnets.


A comparison shot with a mule

And with an enforcer dropship

I decided to put the landing gear down on my plague variant to make it even more different than the standard GCPS one.


All of these pieces (cockpit, wing tips and tail stabilizers) install the exact same way as the corresponding pieces on the GCPS version.


There are two claws on the front One of them is keyed to fit over the marking near the landing gear - it is too bad they both don't do this.

There is also a different plague weapon - though it has the exact same options as the GCPS version (but the plague gun looks a bit more wicked, so I glued it on).

The wing tips and tail stabilizers work the same way


If you want to mount weapons on the gimbles in the crew compartment, there are plague weapons and arms to use as well. Again, you have to BYOB (bring your own body) for these.


In addition there are a couple of corpses to add to it as well. One has separate arms that go over its head.


The other has no obvious place, so I put him on the top

And it is done


Comparing it to the plague mule.


So what are your favorite Warpath / Firefight vehicles?
Because it is all fun and games . . .
Comments
Post a Comment