Back in the day when I used to play Confrontation, I spent a lot of time making terrain for it. Specifically for the US Championship that was held at Gencon in Indianapolis every year. I worked with the event organizers to get a free badge in exchange for providing terrain for scenarios. Examples of this were trees and wood piles, or a river with bridges and fords across it, or buildings that you could stick fire tokens on, or even fields with harvest tokens and carts to hold the tokens.

Since I have so much, I have been trying to use some of my old confrontation terrain for Kings of War. The US Masters is coming up, and I've been asked to help with it (since it is in our region (the Mid-west) (in Chicago)). One of the things that we are want to have is height 0 difficult terrain - and fields are perfect for this.
There is a difference for rank-n-flank games - you have to be more aware of how units will interact with the terrain. In a skirmish game - the corner fences (which I think look nice) really aren't an issue, as everything is single model. But trying to move a unit over a corner of something that is no where near flat is a bit more difficult.
With that in mind, and after a little discussion with the team, I spent the weekend de-fencing the terrain.
So much like building it in the first place, I thought (hoped) that people might be interested in seeing how I did this. Each of these fields (I've actually given some away I think at one time I had enough for 20 tables (which would be 60 fields)) was made from a 1 foot square of MDF, with sand for texture, painted with green flock and brown static grass for the actual field (I had bundles of straw for the harvest tokens)). The fences were made from craft sticks and tiny dowels (stained before assembly) - holes were drilled for the dowels then the sticks were glued to them.
So the first step in de-fencing the field is to remove the fence. My trusty Mantic cutters work great on the wooden sticks. It was a bit surprising how many actually ended up NOT being glued to the planks (because each side was 3 points, and weren't always in a perfect line). I would clip the stick as close to the base as possible - and quite a few flew across the basement (I figure I'll be finding them for weeks :-) ).

The bottom board was actually glued not just to the sticks, but also to the base. A pair of needle-nose pliers were used to grip and pull it off. In some cases it came off completely, but more often than not it broke living a thin sliver of wood still attached to the base.

One or both of the uprights might also remain.

The clippers came back to clip and try to clean off as much of this wood as possible

as well as remove the uprights if they did not break off with the boards.

After a few quick minutes, I now had a much flatter field, with some slivers of wood in each corner.

One other advantage of de-fencing the fields is it greatly reduced the amount of space needed for storage. Just for fun, I stacked 20 fields with fences and the 20 fields without together for comparison. The stack of 20 without fences was as 3 1/2 fields with them. At one point I had three banker boxes full of these (down to 2 with some loose ones now) - if I eventually do this to all of them they will all fit in half a box!

The next step was to remove the last splinter of wood in most of the corners. My first attempt was to use my Ryobi electric sander

which worked well, for a couple of these.

But then I remembered I had an old bench grinder. My dad bought this for me at a garage sale fifteen or twenty years ago (and it was old then). The grinding wheels are almost gone, but the motor is in great shape.
I had last used this back when I was making these fields (and rivers) originally. When you cut MDF (and these are the darker sheets, which are not as dense as the stuff being used for trays and terrain now) it tends to leave one side very rough (the MDF has a smooth finished side, and a rougher unfinished side). To make it usable, you had to smooth out this rough edge. The bench grinder worked fantastic for that. (Be aware, if you are cutting or sanding (or grinding) MDF you will get a LOT of very find sawdust - you should always wear protective eye wear and a mask (unless you want to be coughing up brown dust for days).

I had just enough grinding wheel left to make it through all the fields - it took off not only the little splinter of wood, but the sand around it as well, making the corners nice and smooth. I was able to do all 80 corners in about 10 minutes.


Now that the fields were completely defenseless, it was time to repair the damage. First step was to re-texture the areas where the fences were with sand.

This works exactly the same way as you do it for basing miniatures. Apply thinned PVA glue (usually 1-1 with water, for these I left it a little thicker)

then dip it into sand

Shake off the excess and leave to dry. The sand here looks almost the same as the tan static grass representing the harvested crops.

Once it is completely dry, I then painted it up to match the original. The base color is a dark brown - if I'm only doing a little bit, I use Valejo Game Color 72.045 - Charred Brown. For larger bases and things this size, I have found that Faskolor - Fasdark Brown matches it very well. The difference is this comes in 60 ml bottles instead of the 17 ml dropper bottle for Valejo paints. (That is one thing to be very aware of - when you are working on terrain you will use a LOT more paint than you do for miniatures - so you often need to look for other sources).

Next was a heavy drybrush of Valejo Game Color 072.043 - Beasty Brown.

Then a medium drybrush of Valejo Game Color 072.039 - Plague Brown

and a final light drybrush of Valejo Game Color 072.034 - Bonewhite.

Now that these have been fully painted, it is time to restore some of the ruined grass that was trampled when we tore out the fences.
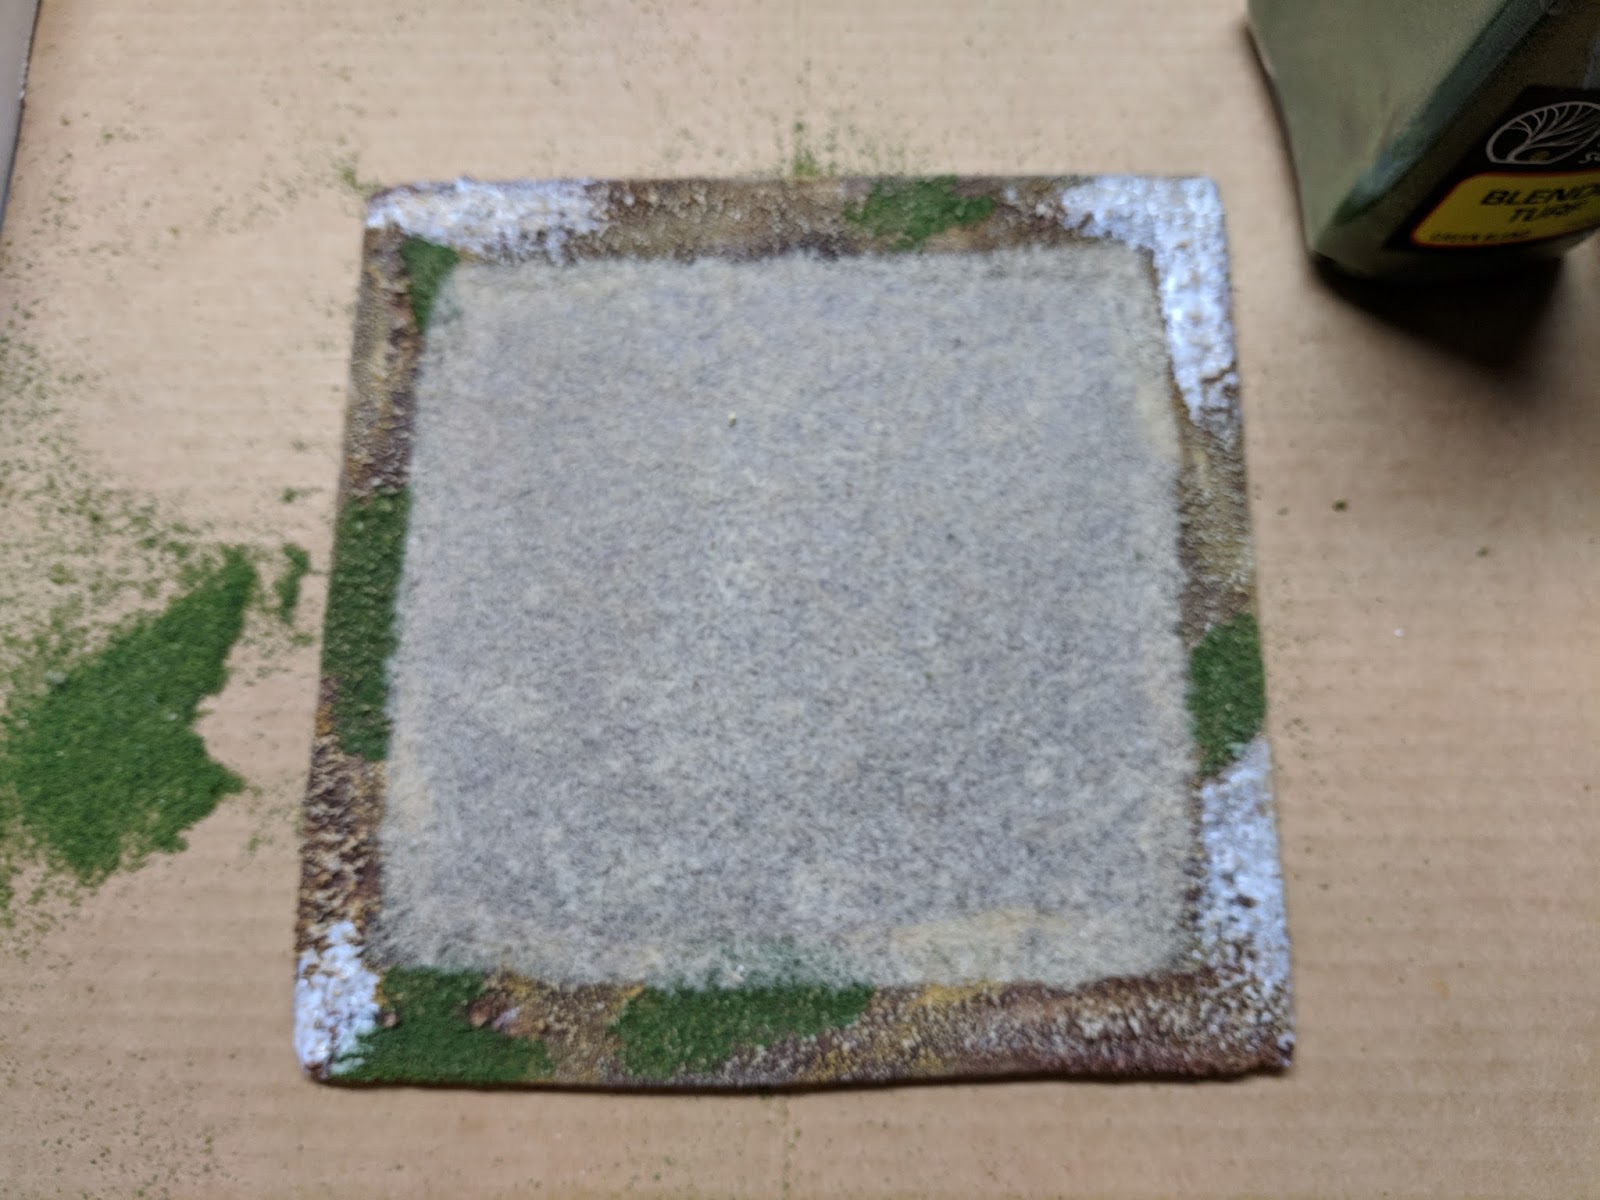
This is applied the same was as we did for the sand - watered down PVA then sprinkle with the flock. For this I use Woodland Scenics Blended Turf - Green Blend (T1349). The big advantage to this is it comes is a quart size shaker bottle for about $10 - as opposed to static grass that tends to come in tiny 1 oz tubs for the same price.


And with that, the fields are stacked to dry for the final time

And the fields are now defenseless and ready for battle!

One last bit - there are a lot of different tables / mats that are available - and these fields, while they work on a lot of them, don't match all of them. I have a volcanic mat, and these don't fit at all. Nor would they fit a desert mat.
However for a snow/winter mat all they need is snow, so I decided to take two of the fields and cover them with snow. Once again watered down PVA - but this time make sure to cover ALL the grass and most of the rest, leaving a little uneven spots, then cover it with Woodland Scenics Snow - Soft Flake - SN140.

So now I've got 21 fields, height 0 difficult terrain, in my collection (so expect to be seeing a lot more of these both at Masters as well as the tournaments I'm running - such as AdeptiClash, DayCon, War Kings GT, Origins GT, Kings of Gencon and Gem City Massacre.
Because it is all fun and games . . .

Since I have so much, I have been trying to use some of my old confrontation terrain for Kings of War. The US Masters is coming up, and I've been asked to help with it (since it is in our region (the Mid-west) (in Chicago)). One of the things that we are want to have is height 0 difficult terrain - and fields are perfect for this.
There is a difference for rank-n-flank games - you have to be more aware of how units will interact with the terrain. In a skirmish game - the corner fences (which I think look nice) really aren't an issue, as everything is single model. But trying to move a unit over a corner of something that is no where near flat is a bit more difficult.
With that in mind, and after a little discussion with the team, I spent the weekend de-fencing the terrain.
So much like building it in the first place, I thought (hoped) that people might be interested in seeing how I did this. Each of these fields (I've actually given some away I think at one time I had enough for 20 tables (which would be 60 fields)) was made from a 1 foot square of MDF, with sand for texture, painted with green flock and brown static grass for the actual field (I had bundles of straw for the harvest tokens)). The fences were made from craft sticks and tiny dowels (stained before assembly) - holes were drilled for the dowels then the sticks were glued to them.
So the first step in de-fencing the field is to remove the fence. My trusty Mantic cutters work great on the wooden sticks. It was a bit surprising how many actually ended up NOT being glued to the planks (because each side was 3 points, and weren't always in a perfect line). I would clip the stick as close to the base as possible - and quite a few flew across the basement (I figure I'll be finding them for weeks :-) ).

The bottom board was actually glued not just to the sticks, but also to the base. A pair of needle-nose pliers were used to grip and pull it off. In some cases it came off completely, but more often than not it broke living a thin sliver of wood still attached to the base.

One or both of the uprights might also remain.

The clippers came back to clip and try to clean off as much of this wood as possible

as well as remove the uprights if they did not break off with the boards.

After a few quick minutes, I now had a much flatter field, with some slivers of wood in each corner.

One other advantage of de-fencing the fields is it greatly reduced the amount of space needed for storage. Just for fun, I stacked 20 fields with fences and the 20 fields without together for comparison. The stack of 20 without fences was as 3 1/2 fields with them. At one point I had three banker boxes full of these (down to 2 with some loose ones now) - if I eventually do this to all of them they will all fit in half a box!

The next step was to remove the last splinter of wood in most of the corners. My first attempt was to use my Ryobi electric sander

which worked well, for a couple of these.

But then I remembered I had an old bench grinder. My dad bought this for me at a garage sale fifteen or twenty years ago (and it was old then). The grinding wheels are almost gone, but the motor is in great shape.
I had last used this back when I was making these fields (and rivers) originally. When you cut MDF (and these are the darker sheets, which are not as dense as the stuff being used for trays and terrain now) it tends to leave one side very rough (the MDF has a smooth finished side, and a rougher unfinished side). To make it usable, you had to smooth out this rough edge. The bench grinder worked fantastic for that. (Be aware, if you are cutting or sanding (or grinding) MDF you will get a LOT of very find sawdust - you should always wear protective eye wear and a mask (unless you want to be coughing up brown dust for days).

I had just enough grinding wheel left to make it through all the fields - it took off not only the little splinter of wood, but the sand around it as well, making the corners nice and smooth. I was able to do all 80 corners in about 10 minutes.


Now that the fields were completely defenseless, it was time to repair the damage. First step was to re-texture the areas where the fences were with sand.

This works exactly the same way as you do it for basing miniatures. Apply thinned PVA glue (usually 1-1 with water, for these I left it a little thicker)

then dip it into sand

Shake off the excess and leave to dry. The sand here looks almost the same as the tan static grass representing the harvested crops.

Once it is completely dry, I then painted it up to match the original. The base color is a dark brown - if I'm only doing a little bit, I use Valejo Game Color 72.045 - Charred Brown. For larger bases and things this size, I have found that Faskolor - Fasdark Brown matches it very well. The difference is this comes in 60 ml bottles instead of the 17 ml dropper bottle for Valejo paints. (That is one thing to be very aware of - when you are working on terrain you will use a LOT more paint than you do for miniatures - so you often need to look for other sources).

Next was a heavy drybrush of Valejo Game Color 072.043 - Beasty Brown.

Then a medium drybrush of Valejo Game Color 072.039 - Plague Brown

and a final light drybrush of Valejo Game Color 072.034 - Bonewhite.

Now that these have been fully painted, it is time to restore some of the ruined grass that was trampled when we tore out the fences.
This is applied the same was as we did for the sand - watered down PVA then sprinkle with the flock. For this I use Woodland Scenics Blended Turf - Green Blend (T1349). The big advantage to this is it comes is a quart size shaker bottle for about $10 - as opposed to static grass that tends to come in tiny 1 oz tubs for the same price.


And with that, the fields are stacked to dry for the final time

And the fields are now defenseless and ready for battle!

One last bit - there are a lot of different tables / mats that are available - and these fields, while they work on a lot of them, don't match all of them. I have a volcanic mat, and these don't fit at all. Nor would they fit a desert mat.
However for a snow/winter mat all they need is snow, so I decided to take two of the fields and cover them with snow. Once again watered down PVA - but this time make sure to cover ALL the grass and most of the rest, leaving a little uneven spots, then cover it with Woodland Scenics Snow - Soft Flake - SN140.

So now I've got 21 fields, height 0 difficult terrain, in my collection (so expect to be seeing a lot more of these both at Masters as well as the tournaments I'm running - such as AdeptiClash, DayCon, War Kings GT, Origins GT, Kings of Gencon and Gem City Massacre.
Because it is all fun and games . . .
Comments
Post a Comment