Unless you have been hiding under a rock, you have heard about The Walking Dead. Mantic released
The Walking Dead: All Out War last year and it was a huge hit, with wave 2 currently in stores and two more waves coming this and next year (and then who knows what else Ronnie has up his sleeve). Check the side index to the right to see all the posts I've already done about The Walking Dead (and there will be more - I haven't had any time yet to paint up my kickstarter wave 2 stuff yet).
One of the key parts of the story and game are the locations. From Herschel's farm to the prison to Woodbury, Hilltop and Alexandria the locations are almost characters themselves. The tension on the farm simply wouldn't be there without the barn and the secret within.
Mantic has released card scenery and mats for some of these locations. However miniature games are played best in 3d, which is why they have released the terrain booster containing 3d cars and objective markers.
However one thing in the base game that is missing is Dale's RV. The base game comes with a cardboard cutout of this, and Mantic has now released a 3d version.
 |
| front |
 |
| back, with a mantic point, of course |
This is the first MDF kit released under the Mantic brand. They do have some dwarf terrain pieces on their web site, but they are not Mantic product - they are just selling them. This is not the only one - with wave 2 they have released an MDF kit for Herschel's farm, including a barn, tractor, fences and hay bales (these are plastic). That is for another post (once I get my hands on one).
This kit comes with a sheet of laser cut MDF, and a second sheet of thinner card
It is important to note that the card sheet (which covers up the MDF) has a front and back - with many of the markings for the RV on the front - which are intended to be facing out. For the MDF pieces, only the tire rims actually have a front and back - the other pieces don't matter because you won't see them.
The 'packaging' (it is only shrink wrapped) has instructions for assembling the RV on the back of each sheet. It is good that they include the instructions, as it is not a 100% obvious kit. I thought I'd walk you through putting it together, and maybe give some hints to make it easier.
So the very first instruction says to glue the floor panel (1) to the centre (there they go, spelling things all funny over in the UK, instead of the 'Merican Way) rib (2).
This would naturally lead you to look for the numbered pieces. Almost all the MDF pieces will be hidden, so they could put numbers right on them. Or next to them. But they didn't. So don't look for the numbers, they aren't there. I don't know why they are referenced in the instructions, but instead you have to identify the parts from the drawings - which, since they show how to put them together don't necessarily give a good view of the actual parts themselves. Too bad someone doesn't write up something that clearly shows the parts and how they fit. Oh, right . . .
Next you the front roof support beam, rear roof support beam, rear seat beam and dash beam to the rib support. The front roof support beam DOES NOT have the two nibs on the top - that is the rear roof support beam.
 |
| roof support beams |
 |
| in place |
The dash and rear seat beams are easier to find - the dash beam has the nib flat with the side - the rear seat has it offset a bit.
 |
| beams in place |
The beams don't really want to stay in this configuration, but once you put on the sides everything now starts to come together and hold its shape. Each of the nibs on the beams fits into a hole in each side, as do the nibs on the floor.
 |
| body side, showing where the roof beams fit |
 |
| one side attached - everything fits in its place |
At this point I recommend using some rubber bands to hold everything together until it dries. Don't wrap them too tightly as too much pressure can warp the wood. I don't tend to see rubber bands used on miniatures, but on terrain I use them a lot (because most buildings are some type of
cuboids (cuboid is your new word of the day children - see how many times you can use it!)
 |
| held together to dry. |
For several of the card pieces, you are asked to lightly score them. If you aren't familiar with this, it is where you take a sharp hobby knife and make a very shallow cut in the piece. Be careful - you do NOT want to cut all the way through, so use a very light touch. You are just trying to weaken a spot so that it is easily bent. A straight edge is good as a guide, though there are lines on all the pieces where they should be scored.
 |
| And the score is 1 to nothing |
The next step is to glue the front and back panels onto - well the front and back of the rv. These do not actually interfere with the sides, so you can add them to your rv even while you have rubber bands around it and it is drying.
I then added more rubber bands lengthwise around it to hold the panels in place while drying.
 |
| front panel |
 |
| rear panel |
The next instruction is to glue the axles to the bottom of the body. The axles don't look like you expect, though aren't as hard to identify as the support beams.
 |
| I named them Rose and Foley (Yes, I grew up in the 80's) |
I actually do NOT recommend doing this step next. The axles don't help at all, and I feel that it will be a bit easier to wait until the end after you have attached the tires to glue these on (it will make the tires a little easier to do).
The next piece is the main van card panel - one piece that goes from the front bumper to the back bumper. Note, that the hubcaps are in the front window - so don't lose them when you cut that out. (Why are there different hub caps? Probably because they were drawn that way in the comic - but why?)
 |
| main body panel |
Just above the front window are three lines you have to score. This is to allow the front to curve instead of having a flat turn. Be careful with these - it is challenging to bend these very thin strips, and also easy to have the card start to separate.
The holes in the room match up with nibs on the beams - but the square of holes do not - as these are for the railing. Once again rubber bands are recommended as this large piece dries.
 |
| large panel front |
 |
| large panel back |
After the main panel has set, glue the side panels on. These are distinct because of the details cut into each side. Also the left side panel has two windows that need to be cut out - these have the vents that you will need later (like the hubcaps on the front window).
 |
| panel and vents |
 |
| the right panel has the door |
 |
| the left panel has more windows |
Once again, rubber bands (not pictured) to hold everything in place.
Once all the panels are dry, glue the vents to the roof
The air conditioner is actually two pieces - the smaller underneath. Nice detail to show the screen beneath where the fan would be.
Now is when I would recommend doing the tires and axles (the instructions have you doing the tires AFTER the roof racks and mirrors - which means you will be working with this upside down on fragile pieces. This way is, to me simpler and easier, and will give you less opportunity to break off any detail.
Each wheel is four pieces - two in the back, then a hubcap and the rim. The fancier hubcaps go on the back.
The best way to assemble the wheels is onto the axle - this keeps all the holes aligned. The two back pieces go over the bigger nib, and the hubcap on the smaller (with the design out). Make sure you use the same hubcap on both sides of each axle.
 |
| what the wheel looks like - this is NOT glued yet |
Once the wheels are glued to the axles, then glue the axles underneath. There are two holes for the nibs on the axles
 |
| No, I followed the directions |
This allows you to set the rv on it's roof when putting the axles on.
Then glue the four roof rack sides into place. These seem a little flimsy to me - we'll see how they hold up to game play
Then the front bumper and rearview mirrors.
Lastly is the sun canopy. The instructions list this as optional - however I could not get it to stay in place so I just glued it on. This made it easier to put on, but the cardboard piece has it extended - so gamewise it always has it extended (I don't think there will be any game scenario with the survivors driving the rv).
And that is all it takes. Some shots of the finished model (in the light box), with the cardboard cutout underneath for comparison. The 3d model is a little smaller, but should still look awesome on your game table.
So now you have a somewhat safe place to get away from the walkers. Just don't let
Robin Williams drive it.
 |
| ready to play the scenario |
Because it is all fun and games . . .
 This kit comes with a sheet of laser cut MDF, and a second sheet of thinner card

 The 'packaging' (it is only shrink wrapped) has instructions for assembling the RV on the back of each sheet. It is good that they include the instructions, as it is not a 100% obvious kit. I thought I'd walk you through putting it together, and maybe give some hints to make it easier.
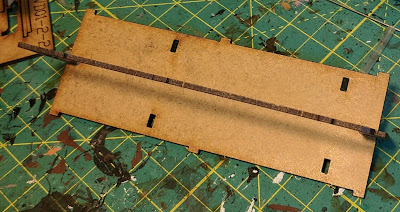

 Now is when I would recommend doing the tires and axles (the instructions have you doing the tires AFTER the roof racks and mirrors - which means you will be working with this upside down on fragile pieces. This way is, to me simpler and easier, and will give you less opportunity to break off any detail.


 Then the front bumper and rearview mirrors.


Comments
Post a Comment